01Front of tower coolers, radiators and case vents
Cooling Fans
Usually 120 mm or 140 mm wide. Modern 4-pin fans automatically spin faster when hot and slower (quieter) when cool; larger 140 mm fans move similar air more quietly.
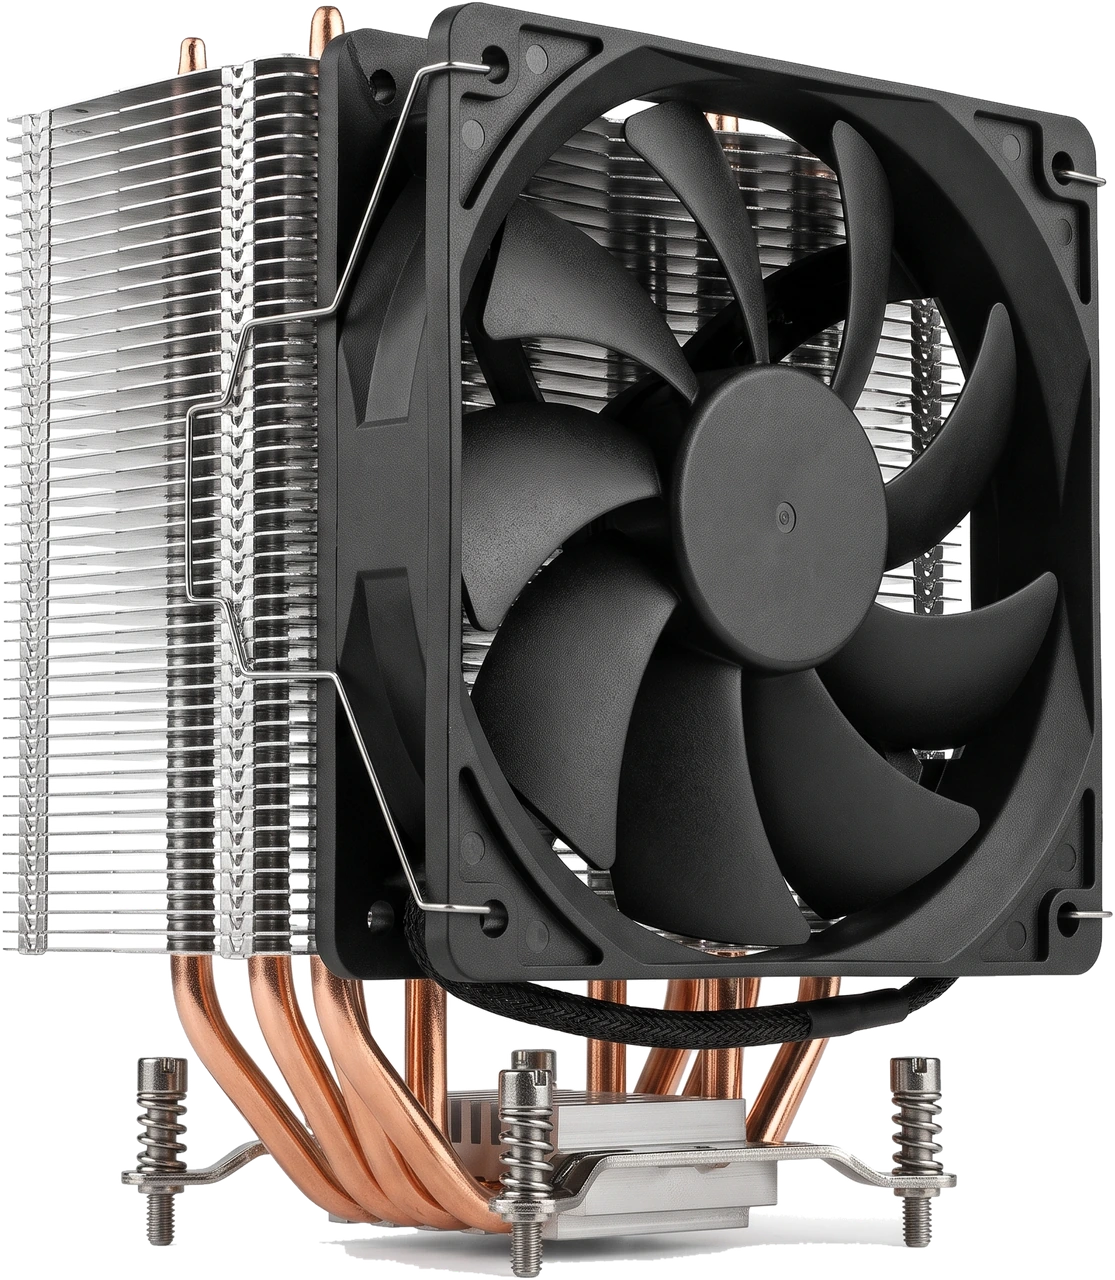
The cooling system removes excess heat from the CPU, Graphics Processing Unit (GPU) and inside the case so every component stays at safe operating temperatures.
Almost all electrical power used by processors and graphics chips turns into heat. Without reliable cooling, temperatures climb quickly until built-in protections automatically slow the computer down to protect itself (called thermal throttling) or shut it down abruptly.
Cooling works as a simple chain: thermal paste fills tiny invisible air gaps between the metal processor lid and the cooler base, copper pipes or pumped liquid carry heat into wide metal fins, and spinning fans push warm air out of the case while drawing cool room air in.
Across the tower air cooler above and the All-in-One (AIO) liquid cooler and case fans below, look for these six practical parts:
Usually 120 mm or 140 mm wide. Modern 4-pin fans automatically spin faster when hot and slower (quieter) when cool; larger 140 mm fans move similar air more quietly.
Thin metal sheets packed closely together to create huge surface area so moving fan air carries heat away fast.
Sealed metal tubes carrying heat quickly from the bottom plate on the CPU up through the aluminium fins.
Compact waterblock with an electric pump sits over the CPU and pushes coolant through flexible tubes to a radiator.
Mounts onto the top or front of the case (common sizes: 120, 240, 280 or 360 mm) where fans push room air through its fins to release heat.
Heat-conducting paste filling microscopic metal pits so heat moves smoothly instead of getting trapped by air gaps. Many new coolers arrive with paste already applied.
Desktop cooling covers CPU air coolers, sealed All-in-One (AIO) liquid coolers, and the chassis intake/exhaust fans that keep cool air flowing through the whole box.
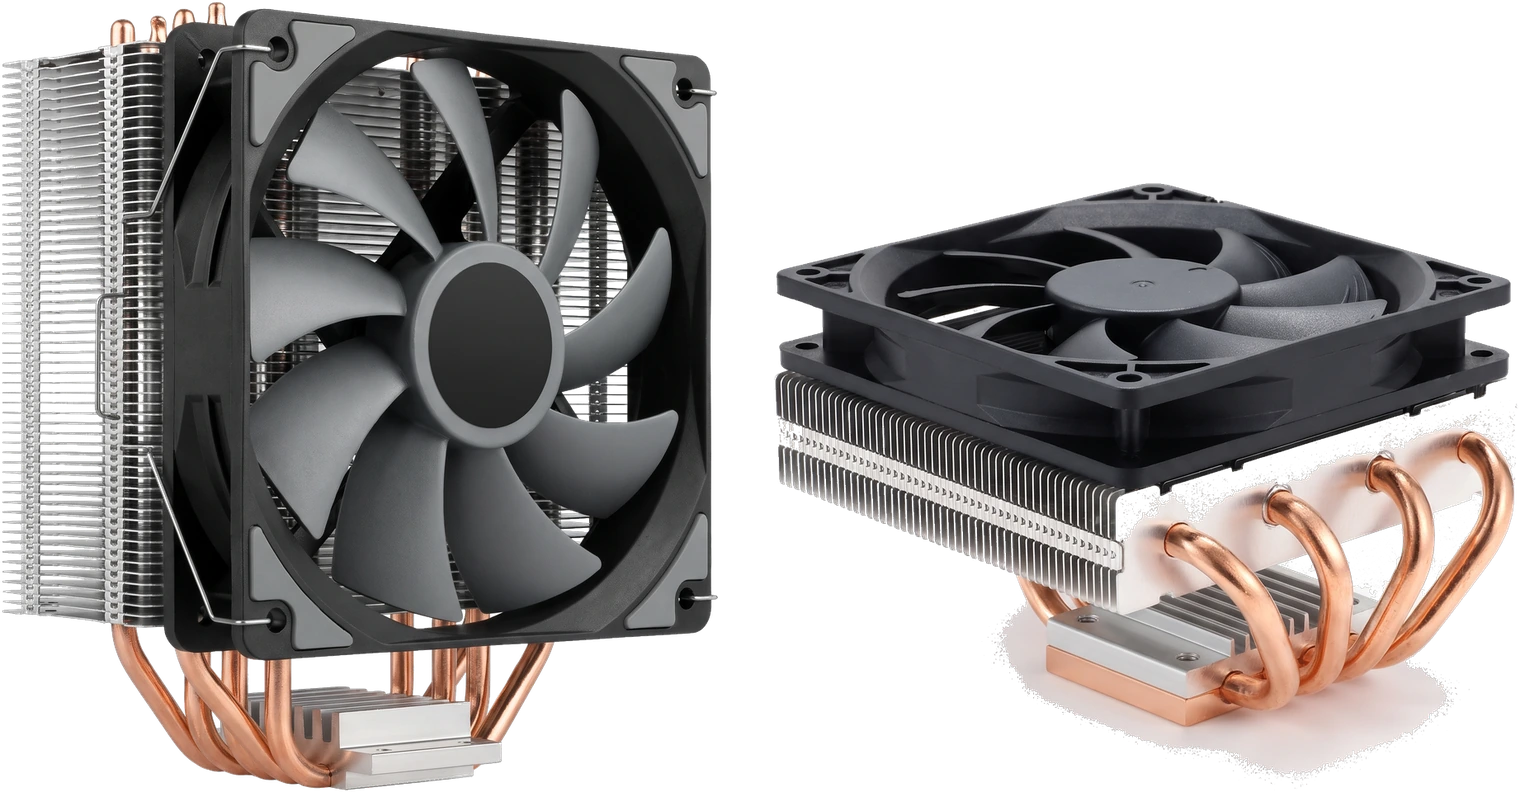
Transfers heat directly up copper pipes into metal fins cooled by one or two fans. Has zero liquid and no mechanical pump to fail, making air cooling simple, affordable and reliable for many years. Tall twin-tower coolers rival mid-size liquid coolers in performance, though check case width and Random Access Memory (RAM) clearance; low-profile models suit tiny Small Form Factor (SFF) cases.
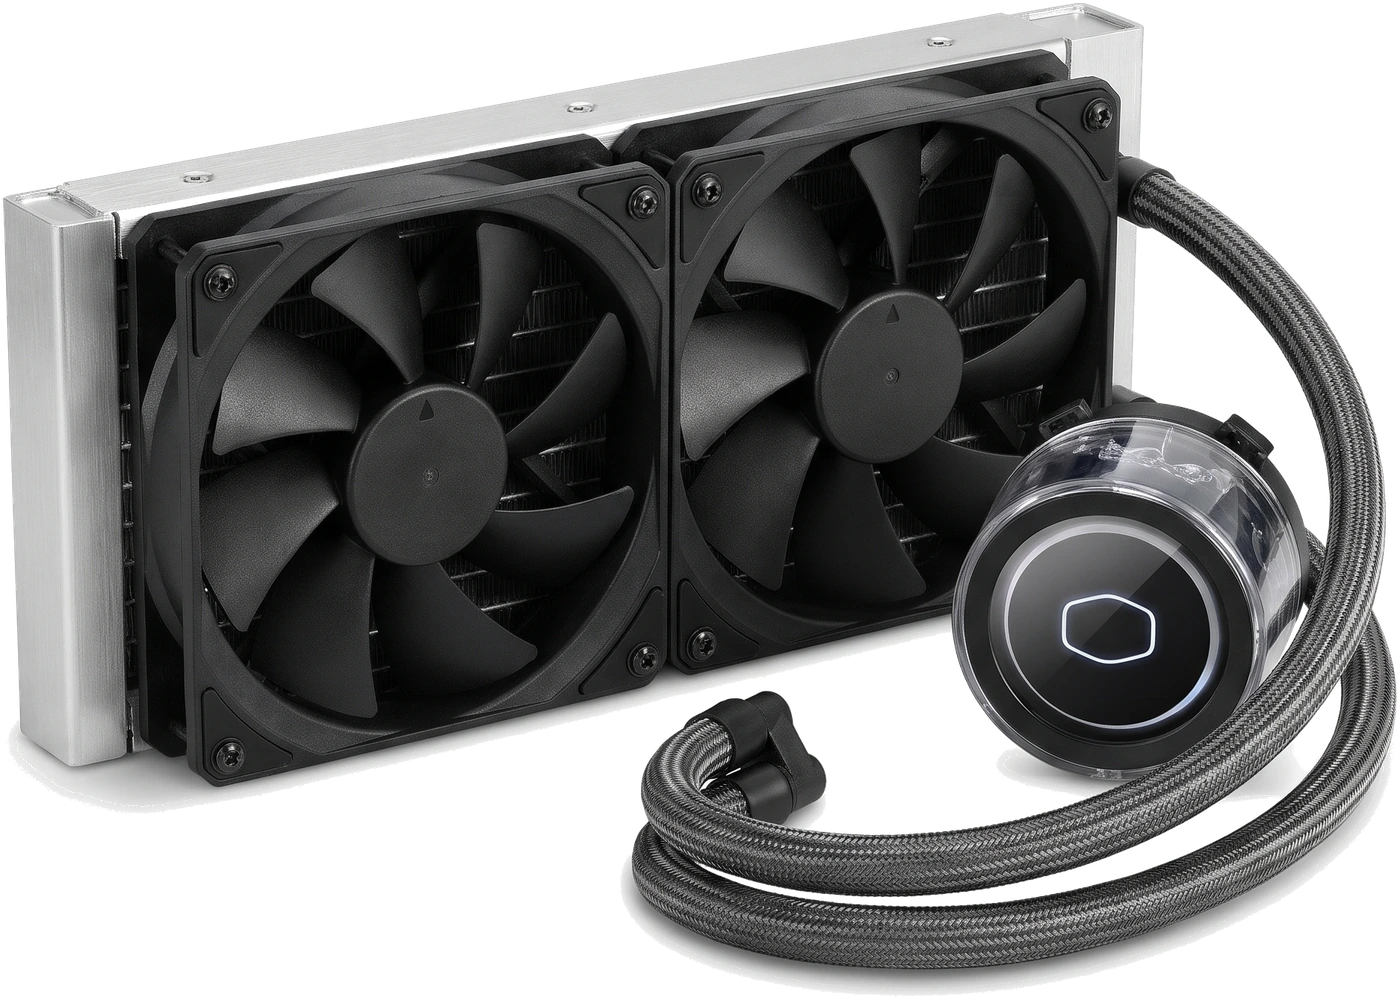
Factory-sealed closed loop circulating liquid between a neat CPU pump block and a case-mounted radiator (240 mm dual-fan example shown). Needs no refilling, keeps the centre of the motherboard uncluttered around tall RAM sticks, and handles heavy high-power processors well on 280/360 mm models, though costs more and adds a pump that can eventually wear out.
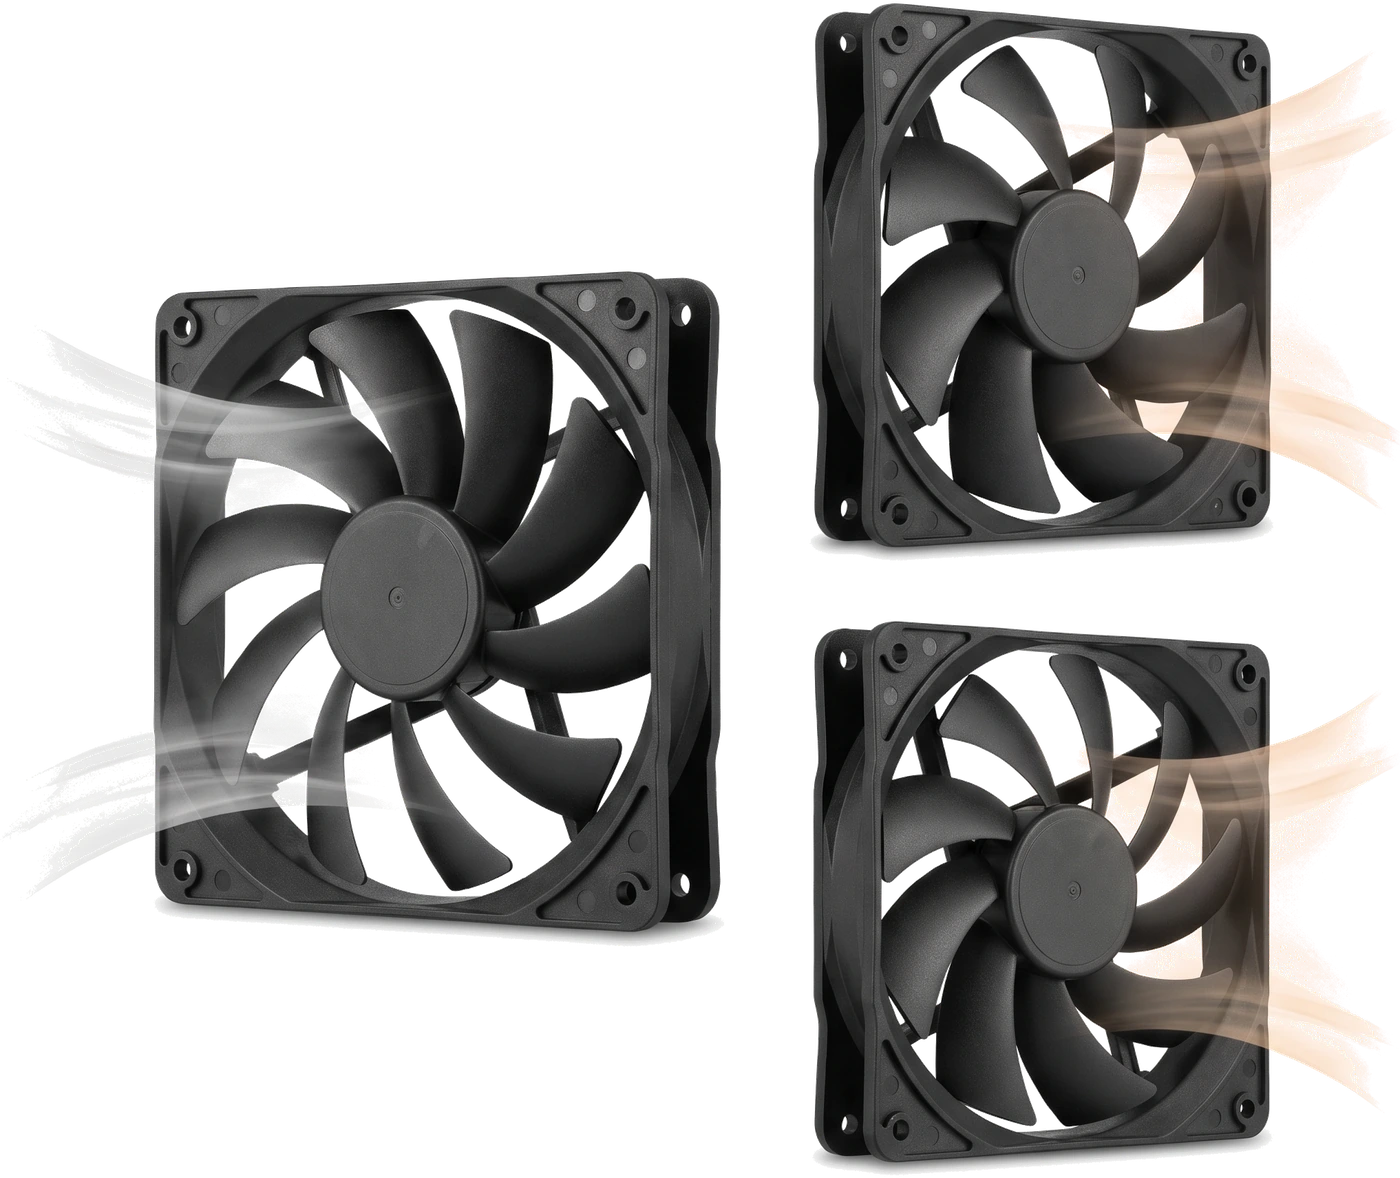
Create a steady fresh-air stream through the case: cool air enters at the front/bottom through dust filters, sweeps over graphics cards and heatsinks, and warm air vents out the rear and top. Look for small direction arrows moulded into the fan edge (or note air normally exits through the side with the plastic motor frame struts).
Liquid cooling is NOT automatically better than air cooling: a solid dual-tower air cooler matches basic liquid units while costing less and lasting longer.
| Feature | Tower Air Cooler | All-in-One (AIO) Liquid Cooler |
|---|---|---|
| Cooling strength | Strong (twin-towers rival 240 mm liquid coolers) | Very strong on larger 280/360 mm radiators |
| Long-term reliability | Excellent (only a fan could ever wear out) | Good, though pumps have finite lifespan and faint hum |
| Space concerns | Case side panel clearance (height) & tall RAM overhang | Needs case 240/360 mm radiator mounts & top thickness |
| Value for money | Best cooling per pound/dollar for most builds | Costs more; chosen mainly for top CPUs or clean looks |
Skip exaggerated marketing numbers on boxes and check real test results, exact socket brackets and case space in millimetres.
Makers test "Cooler Thermal Design Power (TDP)" differently, so do not buy purely from box wattage claims. Mid-range 65 watts (W) to 120 W processors run cool and quietly under an affordable single or dual-tower air cooler; reserve big dual-towers or 280/360 mm liquid coolers for heavy top-tier chips.
Confirm your CPU socket (for example Intel Land Grid Array (LGA) 1700 / 1851 or Advanced Micro Devices (AMD) AM4 / AM5) appears on the cooler box. Many recent coolers fit multiple sockets with interchangeable brackets included.
For air coolers, verify cooler height stays below your case's maximum height and check whether tall decorative Red, Green and Blue (RGB) RAM hits the front fan. For liquid coolers, check your case's supported radiator length (240 vs 360 mm) and thickness above the motherboard.
Look for 4-pin fans that slow down automatically when the Personal Computer (PC) is idle, larger 140 mm fans where supported for lower pitch, and check whether thermal paste comes pre-applied or in a small tube inside the box.
Aim for steady front-to-back air exchange so cool air enters filtered openings and hot air exits quickly.
| Case Area | Standard Fan Direction | Why It Works |
|---|---|---|
| Front panel | Intake (pulling cool air IN) | Draws fresh filtered air straight across graphics card and CPU cooler. |
| Bottom (optional) | Intake (IN, if raised on feet) | Supplies extra cool air directly under hot graphics cards. |
| Rear panel | Exhaust (pushing warm air OUT) | Immediately vents warmed air coming off the CPU cooler and graphics card. |
| Top panel | Exhaust (OUT) | Removes rising warm air cleanly from the upper motherboard zone. |
An expensive CPU cooler inside a sealed solid-front glass box with no intake airflow will still run hot and loud. Good case ventilation and clean dust filters help every part inside stay cool.
A cooler must match your CPU socket mechanically while fitting comfortably around tall RAM sticks, motherboard heatsinks and case side panels.
Bracket support for exact socket, room around upper motherboard heatsinks and a free CPU fan / pump socket.
Total tower height in mm under the case limit (leave 3 to 5 mm breathing room!), or matching 240/280/360 mm radiator mounts.
Check front-fan overhang room if your RAM sticks have tall decorative covers.
Dust build-up is the main cause of rising computer temperatures and loud fan noise, and cleaning it regularly takes only minutes.
Always remove clear protective plastic stickers from a new cooler base before mounting it onto thermal paste. On liquid coolers, position the top of the radiator higher than the CPU pump so trapped air rises into the radiator instead of grinding inside the pump.
Build stalls before first power-on or overheats instantly.
Side panel refuses to close or front cooling fan will not fit over memory.
Hot air gets trapped inside with no cool room air reaching components.
Blocks heat transfer completely, causing instant slowdowns and heat shutdowns.