Step 05: Install M.2 Storage
Select the primary M.2 slot, verify protocol and length support, insert the M.2 Solid-State Drive (SSD) at the specified angle, secure the standoff or latch, and remove thermal-pad film before reinstalling heatsinks.
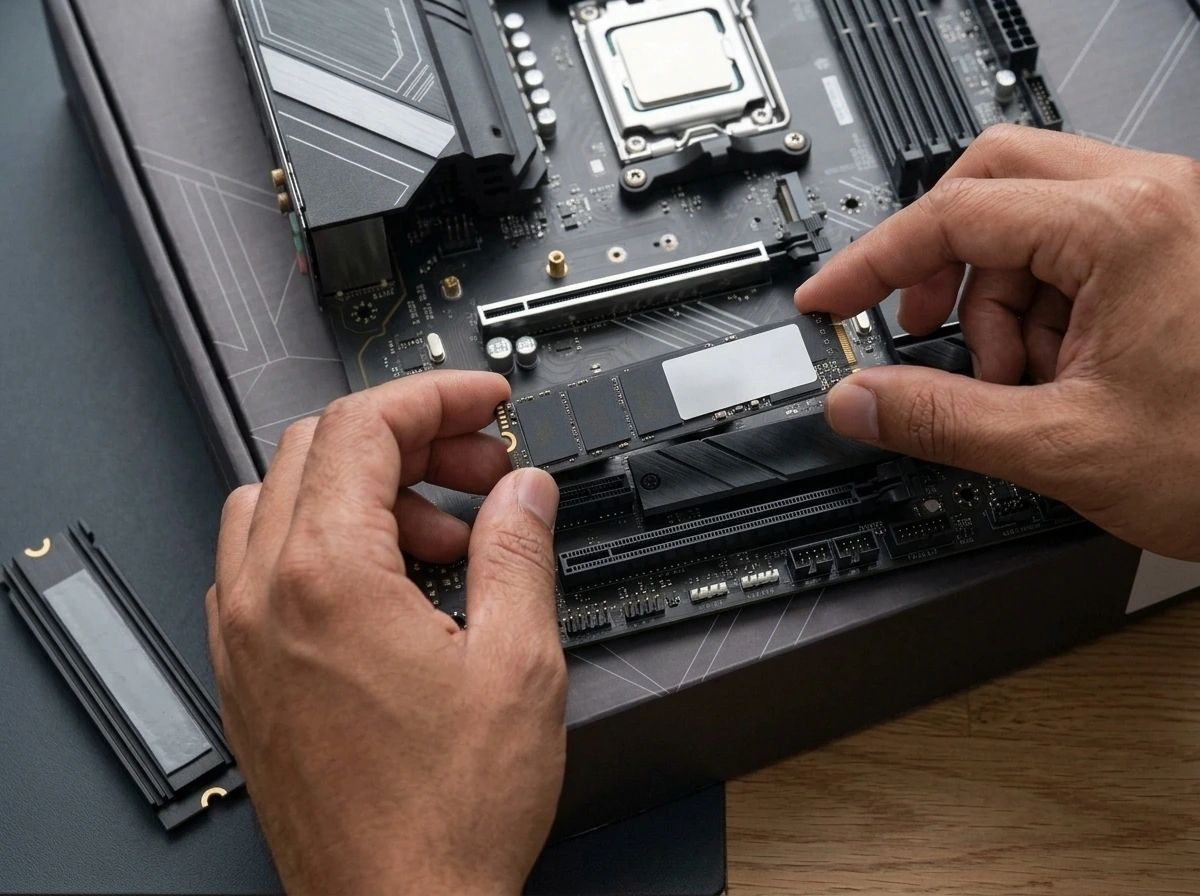
Step-by-Step Instructions
Identify the correct M.2 slot
Consult your motherboard manual to locate the primary Central Processing Unit (CPU)-connected M.2 slot (often labelled M2_1 or M2A_CPU) for your operating-system drive, and remove the motherboard's M.2 heatsink cover if one is installed over that slot.
Confirm the supported drive interface and physical length
Check the motherboard specifications to confirm whether the target M.2 slot supports Peripheral Component Interconnect Express (PCIe) Non-Volatile Memory Express (NVMe) drives, M.2 Serial Advanced Technology Attachment (SATA) drives or both, since M.2 SATA and M.2 NVMe drives are not automatically interchangeable in every M.2 slot. Also confirm the physical form-factor length (typically 2280, meaning 22 millimetres (mm) wide by 80 mm long).
Identify the correct standoff and retention mechanism
Verify that an M.2 standoff is positioned at the hole matching your drive's length (such as the 80 mm mark). Depending on the motherboard, retention uses either a small M.2 screw into the standoff or a tool-free rotating plastic/metal latch.
Insert the SSD at the angle specified by the manufacturer
Hold the M.2 SSD by its edges, align the connector notch with the M.2 slot key and slide the gold contacts smoothly into the slot at roughly a 20-to-30-degree angle until the gold contacts are fully seated.
Secure the drive using the appropriate screw or retention clip
Gently pivot the tail of the SSD down so its semicircular notch rests flat on top of the standoff (never screw the drive directly down onto the motherboard printed circuit board (PCB) without a standoff underneath). Fasten the M.2 screw or turn the tool-free latch to hold the drive level.
Remove the protective film from the motherboard heatsink's thermal pad
If your motherboard includes an M.2 heatsink (or bottom thermal pad), peel off the clear or blue plastic protective film from the thermal pad(s) before reinstalling the heatsink.
Secure the heatsink without excessive pressure
Place the M.2 heatsink back over the drive, align its screw holes and tighten the screws until snug without overtightening or bowing the SSD.
Important Warnings & Precautions
- M.2 NVMe and M.2 SATA drives use different signalling protocols and are not supported in every M.2 slot, so always verify slot compatibility in the motherboard manual.
- Never tighten an M.2 drive down directly against the motherboard without its standoff in place; the drive must sit parallel to the board.
- Always peel the protective plastic film off M.2 heatsink thermal pads before mounting the heatsink.
Step 05 Completion Checklist
Confirm every item below before moving to the next step:
- Target M.2 slot confirmed compatible with the drive's protocol (NVMe or SATA) and length.
- M.2 SSD inserted fully into the slot connector and resting level on the standoff.
- Drive secured with the M.2 screw or tool-free retention latch.
- Protective film removed from M.2 heatsink thermal pads and heatsink reinstalled evenly.
Relevant Components in This Step
Open any component page to review its physical parts, types and specifications: