Step 02: Prepare the Case and Cooling Layout
Remove case panels, verify motherboard standoff locations, install a separate rear Input/Output (I/O) shield if required, plan intake/exhaust airflow and pre-route front-panel cables.
Step-by-Step Instructions
Remove the appropriate side panels and case panels
Unscrew the captive thumbscrews or release the panel latches to remove both the main side panel (tempered glass or mesh) and the rear cable-management panel. Store tempered-glass panels flat in a safe location away from hard tile floors.
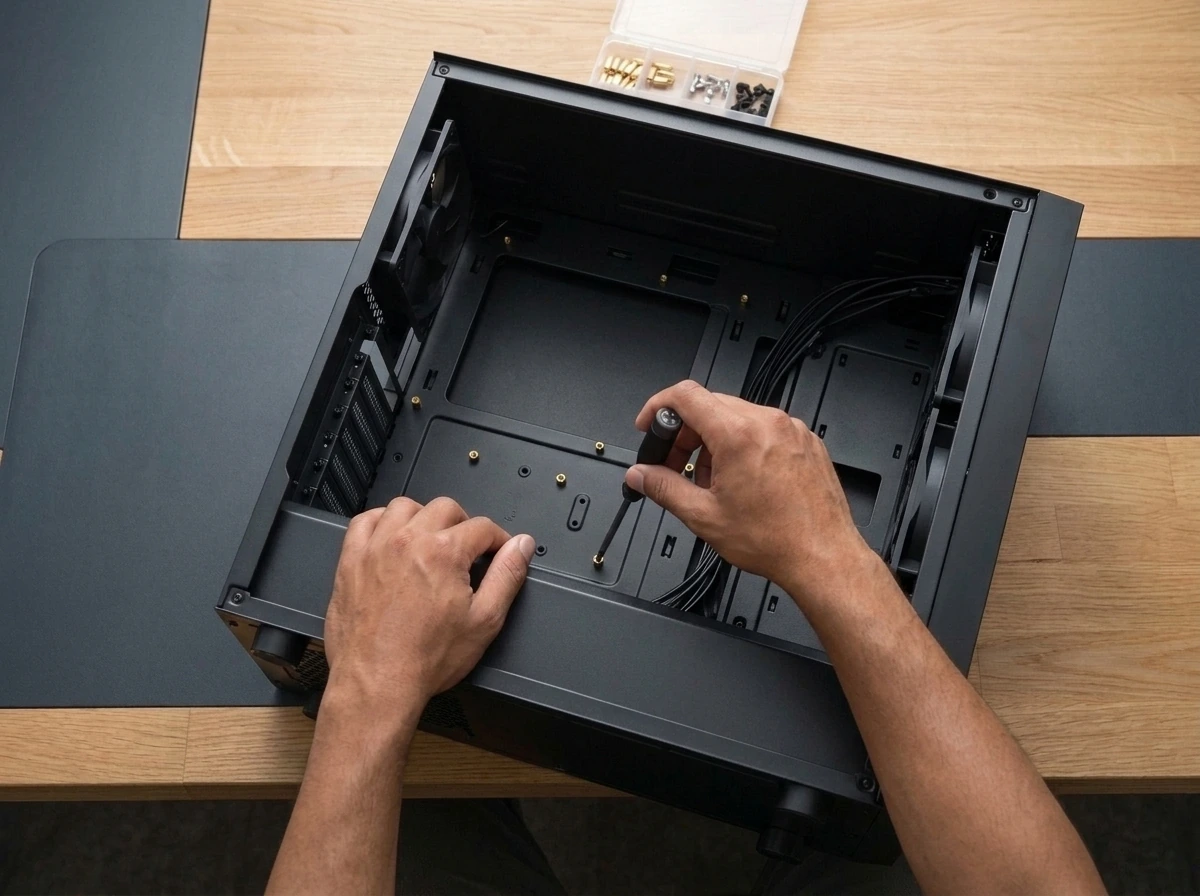
Identify the motherboard mounting positions and install required standoffs
Compare the mounting holes on your motherboard against the stamped legends on the case's motherboard tray (Advanced Technology eXtended (ATX), Micro Advanced Technology eXtended (Micro-ATX) or Mini Information Technology eXtended (Mini-ITX)). Install brass standoffs only in the exact positions that match your motherboard's mounting holes.
Remove any incorrectly positioned or additional standoffs
Check the tray carefully and remove any pre-installed standoff that does not line up with a mounting hole on your motherboard. An extra standoff pressing against the underside of the printed circuit board (PCB) can short-circuit traces and damage the board.
Check whether the motherboard has an integrated rear I/O shield
Many modern motherboards feature a pre-mounted rear I/O shield. If your motherboard uses a separate snap-in metal I/O shield, orient it so the port cutouts match the motherboard's rear connectors and press it firmly into the case's rectangular rear cutout from the inside until all four edges click flush.
Identify the mounting positions for storage drives, case fans and radiators
Locate the 2.5-inch Solid-State Drive (SSD) trays, 3.5-inch Hard Disk Drive (HDD) cages, dust filters and fan/radiator brackets at the front, top, rear and bottom of the chassis.
Install case fans and radiator hardware now when this improves access
If top or front fan brackets will become cramped once the motherboard and Central Processing Unit (CPU) cooler are installed, mount those case fans now. Consult your case, radiator and cooler manuals to determine the exact mounting arrangement for your hardware.
Configure intake and exhaust airflow using the fan's directional markings
Check the directional airflow and blade-rotation arrows moulded into each fan frame (on most standard axial fans, air enters the open front face and exits through the side with the motor support struts). Follow your case and cooler manuals to balance cool intake air (typically front/bottom/side) with warm exhaust air (typically rear/top) without fighting natural airflow paths.
Route accessible front-panel and case cables toward their destinations
Untangle the pre-installed front-panel cables (Power Switch (POWER SW), Reset Switch (RESET SW), light-emitting diode (LED) status indicators, Universal Serial Bus (USB) 3.x, USB Type-C and High Definition (HD) Audio) and feed them through the rear routing grommets toward the edges where the motherboard headers will sit.
Important Warnings & Precautions
- Never leave an unused metal standoff underneath the motherboard where there is no corresponding mounting hole.
- Do not prescribe or force one universal fan or radiator layout; always verify clearance and orientation in your specific case and cooler manuals.
- Install a separate rear I/O shield before mounting the motherboard; it cannot be inserted from the outside afterward.
Step 02 Completion Checklist
Confirm every item below before moving to the next step:
- Correct standoff positions verified against the exact motherboard form factor; extra standoffs removed.
- Rear I/O shield installed in the chassis (or integrated I/O shield confirmed on the motherboard).
- Drive bays, fan mounts and radiator positions identified.
- Planned intake and exhaust fan orientations verified using frame markings.
- Front-panel cables routed cleanly behind the motherboard tray.
Relevant Components in This Step
Open any component page to review its physical parts, types and specifications: