Step 01: Safety, Compatibility and Workspace
Verify full hardware compatibility, confirm every cable and screw is present, review manufacturer manuals and set up a clean, static-controlled work surface.
Step-by-Step Instructions
Confirm that all components are compatible
Before opening sealed boxes, verify every critical compatibility pairing across your hardware:
- Central Processing Unit (CPU) socket and motherboard compatibility (for example, Intel Land Grid Array (LGA) sockets LGA1700/LGA1851 or Advanced Micro Devices (AMD) AM5/AM4).
- CPU support and required motherboard Basic Input/Output System (BIOS) version: confirm the board's factory BIOS supports your exact processor model.
- Random Access Memory (RAM) generation and motherboard support (Double Data Rate 4 (DDR4) vs. Double Data Rate 5 (DDR5) modules are physically keyed differently and are not interchangeable).
- CPU cooler socket compatibility and physical clearance (confirm air-cooler height clears the case side panel and RAM modules, or confirm All-in-One (AIO) liquid cooler radiator size fits the case's mounting brackets).
- Motherboard and case form-factor compatibility (Advanced Technology eXtended (ATX), Micro Advanced Technology eXtended (Micro-ATX) or Mini Information Technology eXtended (Mini-ITX) mounting layout).
- Graphics Processing Unit (GPU) length, slot thickness and case clearance around front fans or radiators.
- Power Supply Unit (PSU) wattage, physical length and required power connectors for the CPU, motherboard, GPU and storage.
- Storage interfaces and supported M.2 physical lengths (such as 2280) and protocols (Peripheral Component Interconnect Express (PCIe) Non-Volatile Memory Express (NVMe) vs. M.2 Serial Advanced Technology Attachment (SATA)).
- Fan, AIO pump and lighting header availability on the motherboard or included hubs.
Check that all components, cables, screws and accessories are present
Verify that the case accessory box (standoffs, motherboard screws, drive screws), PSU power cables, cooler mounting brackets for your socket, M.2 screws/latches and thermal compound are all accounted for.
Read the relevant motherboard, case, CPU cooler and PSU manuals
Keep the motherboard manual open to the board layout diagram, Dual In-Line Memory Module (DIMM) slot table, M.2 slot table and front-panel header pinout throughout the build.
Shut down and disconnect all power before handling components
Keep the power supply switched off (O position) and its alternating current (AC) mains cable completely unplugged from both the wall outlet and the PSU throughout assembly.
Work on a clean, stable, well-lit, non-carpeted surface
Assemble on a hard wooden or laminate table in an uncarpeted area with ample lighting and small containers or compartments to keep screws sorted.
Use appropriate Electrostatic Discharge (ESD) precautions
Protect sensitive integrated circuits from electrostatic discharge during handling:
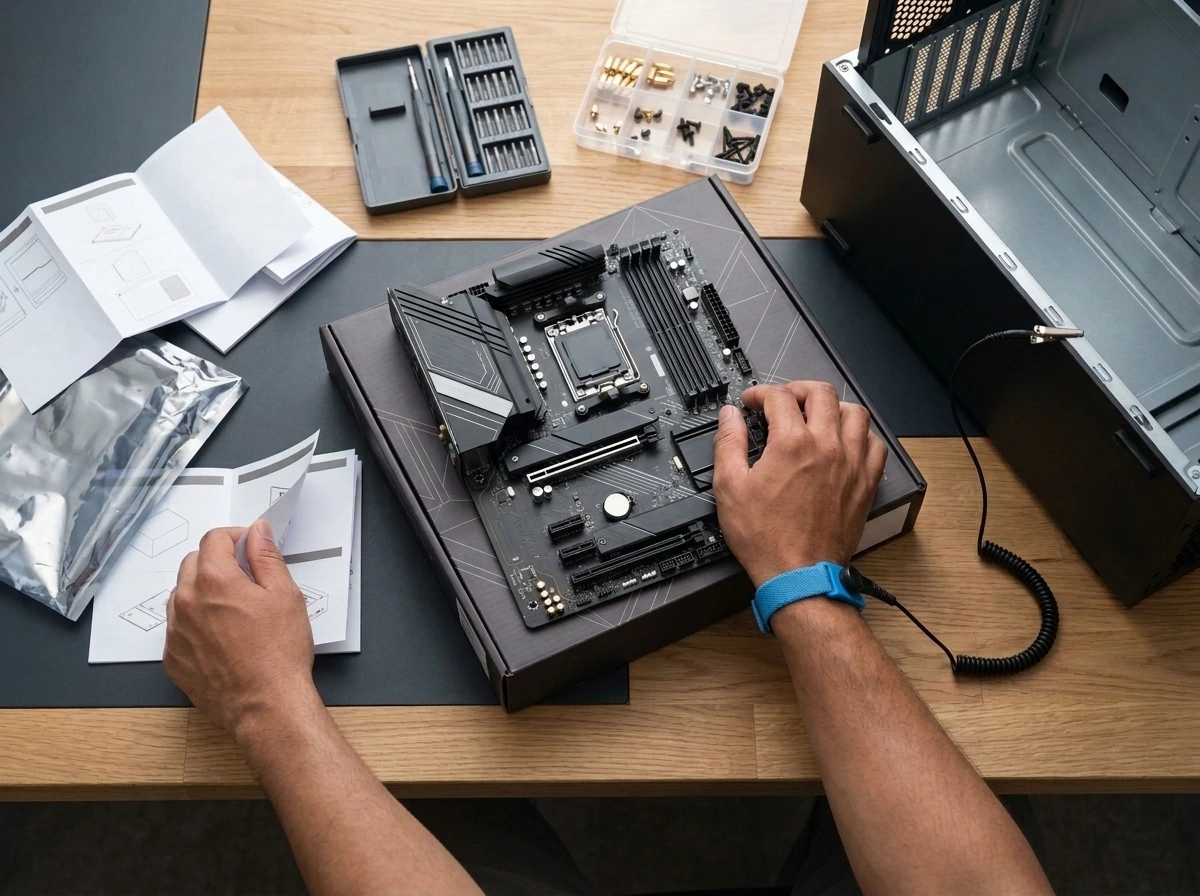
- Wear an anti-static wrist strap connected via an ESD grounding cord to a verified ESD grounding point.
- Handle circuit boards, RAM modules, GPUs and processors strictly by their outer edges or heatsinks.
- Never touch CPU socket contacts, processor contact pads/pins, gold edge connectors or exposed surface-mount circuitry.
- Keep every component inside its ESD-safe shielding bag or original protective packaging until the exact moment you install it.
- Use the flat, non-conductive cardboard motherboard box as a temporary work surface when assembling outside the case. Do not place the motherboard on top of its conductive anti-static shielding bag.
Keep liquids away from the work area
Remove all drinks, liquids and magnetic clutter from the work table before unpacking hardware.
Important Warnings & Precautions
- Never open a power supply enclosure, as high-voltage capacitors inside a PSU can hold dangerous charge even when unplugged.
- Never force a component, screw or power connector into place.
- Never install or remove internal components while the system is connected to AC power or switched on.
- Stop immediately and investigate if any component, bracket or connector does not align or seat smoothly.
Step 01 Completion Checklist
Confirm every item below before moving to the next step:
- All eight component categories verified compatible with one another.
- Motherboard, case, cooler and PSU manuals accessible at the workspace.
- PSU switched off and AC power cord unplugged and set aside.
- Clean, well-lit, non-carpeted table prepared with motherboard cardboard box ready.
- Anti-static wrist strap and ESD precautions in place.
Relevant Components in This Step
Open any component page to review its physical parts, types and specifications: